


What do you do with a password protected WinRAR archive? You hack it - naturally. And how do you hack it? First, download RAR Password Recovery v1.1 RC17 then follow along with this video to crack almost any WinRAR password. So much for security.
open a WinRAR archive without a password
What do you do with a password protected WinRAR archive? You hack it - naturally. And how do you hack it? First, download RAR Password Recovery v1.1 RC17 then follow along with this video to crack almost any WinRAR password. So much for security.
Genoid - Android Theme for Ubuntu
It’s theme for android lovers who use Gnome Environment,it’s called “Genoid”, not much to say,i just try replicated Android Theme to used on Gnome with some modification.
Download Genoid from here
Screenshot

Download Genoid from here
Screenshot

How to Check if Telnet Is Running on a Server
Telnet (TELecommunication NETwork) is a unsecured network protocol used on the Internet or local area network (LAN) connections popularly to remotely access a server from client. The problem with Telnet is that the session is unencrypted with user name and password transmit across network in plain text, greatly increase security risk.
If you want to identify and check if the Telnet service is running on your server, especially on web server or web host which exposes to worldwide attacks, here’s an easy way to perform the verification on Telnet process.
The easiest way to check if the Telnet process is running or not on the server is by using ps command that displays the currently running processes. To check for any running Telnet process, login to the server via SSH (or physically using console, if you can Telnet into the server, obviously the Telnet service is running), and run the following command:
ps -aux | grep telnet
If the result returns any other processes other than “grep telnet” line means that some Telnet process is running or session is opened.
Alternatively, scan your server for open port 23, which Telnet normally uses to connect to. If the port 23 is not closed, mean Telnet service may be running. To check if port 23 is closed or opened, you need to have nmap installed on server. The command to use is:
nmap -sT -O localhost
HowTo Disable Windows 7 Media Player Network Sharing Service (wmpnetwk)
By default, Microsoft has configured Windows 7 to enable and turn on background services when needed. However, some of these background processes are not always in use or required. When they are constantly running, they will consume a large amount of resources and slow down the system’s performance. One of these background processes that many users have highlighted is the wmpnetwk.exe file. The “wmpnetwk.exe” is the key executable for the Windows Media Player Network Sharing Service and it is used to share Windows Media Player libraries (Windows 7 is using Windows Media Player Version 12). Windows Media Player may not be your preferred player and you may not want to have wmpnetwk.exe running to free up some memory, reduce RAM usage and CPU resources. In that case, Windows 7 offers you an alternative to disable and turn it off.
To disable and turn off wmpnetwk.exe, users just need to type “services.msc” in the Windows search box to open Windows 7 Services Microsoft Management Console (MMC) snap-in. MMC allows users to manage and configure Windows services that are running on the computer.

Select “Windows Media Player Network Sharing Service”, right click, and click “Stop” to disable it.

Users can go to the Resource Monitor to check and confirm that wmpnetwk.exe is no longer running. Even though users have successfully disabled wmpnetwk.exe and turned off Windows Media Player Network Sharing Service, this process will be restored every time users restart the computer.
To permanently disable this process, users can go to MMC again, select and right click “Windows Media Player Network Sharing Service”, in the shortcut menu, click “Properties”. Look for “Startup type” item, select “Disabled” so that this process will be permanently disabled even when users restart the computer.

How to Install Perl on Windows XP
1. Download Perl 2. Create Hello World program 3. Learn More
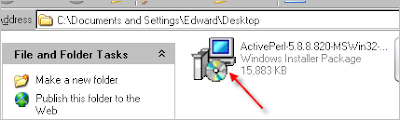
We will now install Perl on your computer using the file you just downloaded.
1. Double-click the ActivePerl icon.
2. Click Next .
 3. Click I Accept... and then click Next .

4. Click Next .

5. Leave the two boxes checked and click Next .

6. Click Install .

7. Wait about 7 minutes.
 8. Uncheck the box and click Finish .

We will now install Perl on your computer using the file you just downloaded.
1. Double-click the ActivePerl icon.

2. Click Next .


4. Click Next .

5. Leave the two boxes checked and click Next .

6. Click Install .

7. Wait about 7 minutes.

